Thursday, May 9, 2013

Spring Break on the Zion Traverse

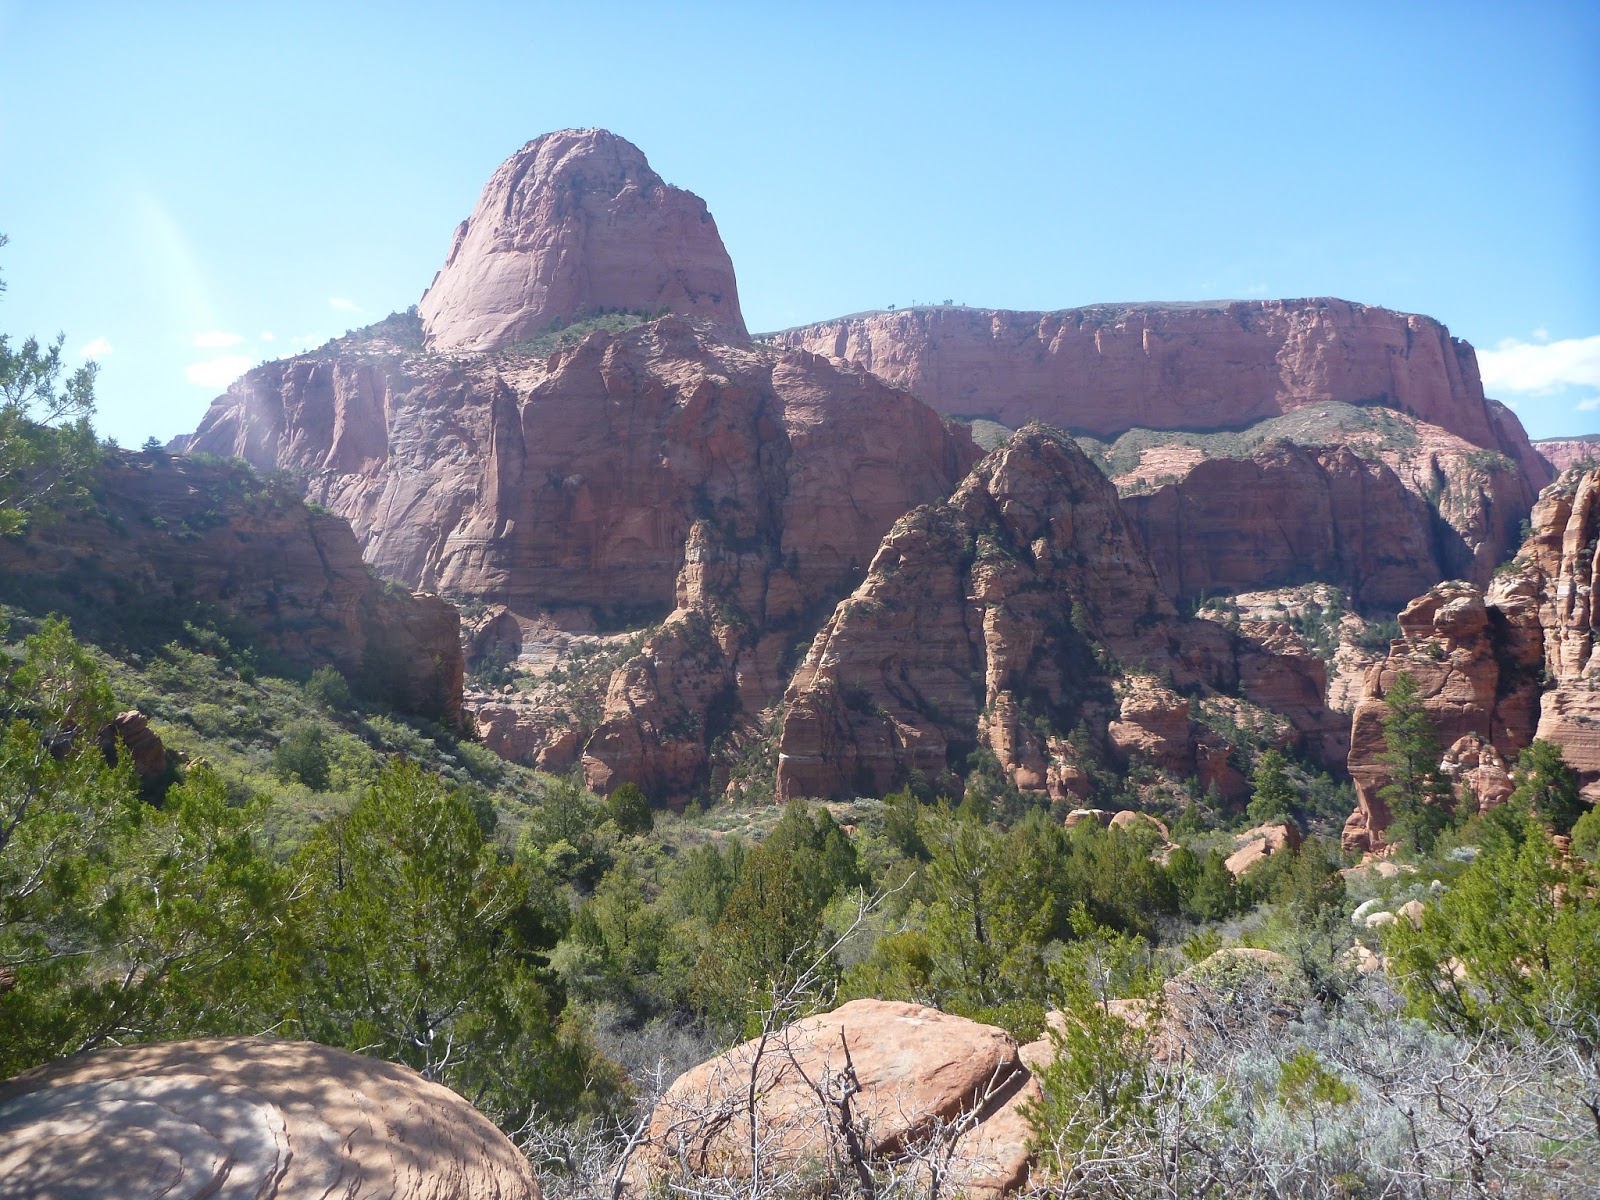
I have been dreaming about running the Zion Traverse since I first learned of the route reading Matt Hart's blog. It seems like every spring when I am reaching my limit with the clouds and rain in Seattle, I read about a Seattle runner making their way to Zion for a little spring break in the sun. I was very lucky to find two Seattle running friends, Brian and Bruce, to join me on the adventure this year. It was finally my turn to have a Spring Break in Zion and it absolutely did not disappoint. There is something about the combination of the shapes and colors of the rocks and the myriad canyons and mesas that just can't be beat. So if you have ever considered running in Zion, don't put it off. I'm hoping I can make this an annual rite of spring.

Andrew Skurka has written pretty comprehensively on the logistics of doing the traverse including an incredibly helpful spreadsheet of water sources and trail junctions along the route. The only suggestion I would add on logistics is that we hired an outfitter, Zion Adventures, to meet us at the western side (Lee Pass), where we left our rental car, and take us to Springdale where we spent the night in a motel. The next morning Zion Adventures picked us up at the hotel and dropped us off at the Eastern Rim trailhead so that we could run back to the car. The cost was reasonable and the service was excellent. This option seemed a little easier than renting a second car although either option would have worked fine. It did occur to me afterwards that if one wanted to conveniently run most of the route solo, it would be easy to hire the outfitter to take you from Springdale to Lee Pass and then you could run to the Grotto and take the free Zion shuttle back to Springdale. That route would encompass about 37 miles of the 48 mile traverse.

If you are looking for more information and inspiration on the Zion Traverse, here are a variety of blog posts people have written about their experiences: Jason Henrie 2010, Jason Henrie 2011, Candice Burt, Ted Mahon, Dax Ross.

Google earth route map
Elevation profile recorded on my Ambit.
East Rim Trailhead to Echo Canyon Trailhead (10.4 miles)
The forecast was for a beautiful, although hot day. The shuttle dropped us off at the East Rim Trailhead right at 6am and a nearly full moon was already providing a little light although we started with headlamps on for the first half hour or so. By the time the sun came up we were looking down into the first of many beautiful canyons. Coming from sea level, we all noticed the effects of the ~6000 feet of altitude immediately. Halfway through this section we came to the Stave Spring and were surprised to find little to no water. It wasn't an issue for us given the cool morning temperatures, but for people running the route in the reverse direction it could be a disaster and it certainly made us nervous about the springs we were counting on later in the afternoon.

The rising sun lights up the moon over the East Rim Trail. Photo by Brian Maher
Bruce running in Echo Canyon. Photo by Brian Maher
Switchbacks coming down from Echo canyon into Zion canyon.


Grotto Trailhead to Western Rim (Miles 11.6 to 16.3)

After a quick mile down the road to the Grotto trailhead, we filled up with water at the spigot outside the bathroom, crossed a footbridge over the Virgin River and started the biggest climb of the day. We knew there would be a lot of people on the climb until we passed the turnoff for Angel's Landing, but this section did not take long and there were few hikers after the turnoff. The views coming up to the top of the western rim were the most spectacular of the route. We made a quick water stop at the West Rim Spring and continued along the West Rim Trail.

Switchbacks just below Angel's Landing. Photo by Brian Maher

Angel's Landing. Photo by Brian Maher
The walls of upper Zion Canyon

Looking back down on the trail through the upper part of Zion Canyon.


Western Rim to Lava Point/Wildcat Canyon (Miles 16.3 to 25.8)

This section is one of the nicest sections to run. The trail goes along the mesa next to the canyon rim and the views into the canyon continued for much longer than I expected. The trail is very runnable with moderate up and down sections and a fair bit of shade. The temperature had reached about 75 degrees by this point in the day. We stopped for water at the Potato Hollow spring at mile 21 which you reach by turning on the trail towards campsite #8.

Typical view along the top of the mesa along the western rim.

View into the canyon from the western rim

View into the canyon from the western rim

Me running on the western rim trail. Photo by Brian Maher
Wildcat Canyon and Connector Trail (Miles 25.8 to 35.3)

We had decided to run the traverse from east to west in order to get the biggest climb of the day over early on fresh legs before it got too hot. Starting around mile 27, we got to reap the reward for this choice since the route goes predominantly downhill for the next 15 miles. The temperature was now in the 80s so the easier downhill trail was appreciated. I nearly stepped on snakes on two different occasions in this section and was happy that the snakes did not react to me jumping over them. I don't think they were rattlesnakes but I really didn't want an encounter with any kind of snake.

Descending into Wildcat Canyon

Firepit knoll where the connector trail crosses Kolob Terrace road
Hop Valley (Miles 35.3 to 41.7)

Hop valley is an amazing section of the trail due to the variety of terrain and scenery. Unfortunately, the temperature was pushing 90, the trail is mostly sand, and this section completely kicked my butt. I have to confess that I was desperate for it to end so that we could start the final section of trail. Hop valley starts as a relatively flat mesa with views to the walls of Kolob canyon along the final section of trail still miles away. After a couple miles of mesa, the trail drops steeply down into a canyon and then meanders along a creek which seems like it will never end.

Bruce running through the sand at the beginning of Hop Valley. Photo by Brian Maher

Looking down into Hop Valley
The never ending section along the creek bed. Photo by Brian Maher
First view of Kolob canyon from the end of Hop Valley
Kolob Canyon (Miles 41.7 to 48.3)

The longest section of our route without a spring was from roughly mile 31 to mile 42. Since the trail crosses a road (Kolob Terrace) at the beginning of Hop Valley, we could have arranged a water drop there to reduce the distance between springs. It all worked fine without the water drop, but  I was completely out of water for the last couple of miles in Hop Valley and was stoked to reach the pretty La Verkin creek at the beginning of Kolob Canyon. Purifying water and refueling should have been paradise, but the area was just plagued by biting horse flies that left my legs covered with welts. By the time we had re-grouped at the creek, re-filled with water and taken stock of the damage the heat had done to us, we decided to hike the last 6 miles out to the car. I can't wait to return for another Spring break in Zion.

La Verkin creek in Kolob Canyon. Photo by Brian Maher
Looking back into Kolob canyon.
Brian at the finishing trailhead at Lee Pass.

Friday, May 3, 2013

Gorge Waterfall 50K

I have been wanting to run the Gorge Waterfall 50K since James initiated the event 2 years ago because everyone who participates raves about the scenery. With San Diego 100 approaching in June, I would use this race as a long training run. In the past when doing a 50K as a training run, I have often piled on the mileage and used a 50K race as a way to get a really big volume week even though it can result in slow running during the race. This year my coach gave me an easy week going into the Gorge race and suggested taking it easy for the first 10 miles or so but then after that to take some risks if things were going well. Since the race starts with a 1500 foot climb, I never really took it easy, but ran pretty hard for the entire course. My average heart rate was 155, just a little lower than the 161 I averaged during January's marathon although this event took considerably longer as I finished in 4:54.

Elevation profile

The course was harder than I expected. It only has about 5000 feet of climbing, but the trail is fairly technical with lots of rocky sections. The rockiness compounded a problem created by my own stupidity. I have orthotics which are attached to insoles and I have taken the normal insoles out of all my shoes. I forgot to bring the orthotics with me on the trip to Oregon which would not have been a big deal, but I did not have any insoles in my Salomon Speedcross 3 shoes. It turned out that Hokas would have been a much better choice of shoe to deal with the rocky trail. The combination of hard rocky trail, no insole and no orthotics had my feet sore and cramping during the second half of the race.

Photo by Glenn Tachiyama

Despite all the raves I had read going into the race, I have to admit that it is unlikely I would do this race again, at least in the current out and back format. I'm not sure why the original point to point course became an out and back. The entire route is near the highway and you rarely are out of earshot.  There is a two plus mile section where you run on the road approaching the turn around. After a mile or so on the trail to the turnaround, you have to do the road section again. The waterfalls are great, but they are a huge tourist attraction so that the trail near Multnomah falls is really clogged with hordes of hikers. We had a beautiful day for the race, sunny skies and temperatures approaching 70 and I am glad that I finally got to participate in this event.

Saturday, January 26, 2013

Marathon Training Wrapup

Enjoying the sun in Phoenix
Eighteen weeks of training ended with the Phoenix Rock and Roll marathon last weekend. The race went extremely well. My goal pace was 7:30 minutes/mile and I finished in 3:17:39, or 7:33 minutes/mile. I felt good the entire race, but was especially happy that I managed a fairly even split. I ran the second half of the race only 4 seconds slower than the first half of the race. I recently read "Run Faster" by Brad Hudson, and his perspective on the key to marathon performance is "Performance in the marathon is almost always determined by what happens in the final 10K, after 20 miles of race-pace running are completed. Either you hold pace or you fall apart." From about mile 5 of the course to about mile 18, there were a group of runners around me going at a similar pace. But my mile 18, I had passed all of these runners and then began to steadily pass runners I hadn't seen before until I reached the finish line. I think the reason that I was able to hold pace so well was a  direct result of the training my coach gave me. In the 18 weeks of training, I did six 20 mile long runs and ten long runs between 16 and 20 miles in length. Of these long runs half of them included speed work as part of the long run. Many of them were progression runs, often ending with 3-5 miles at race pace or faster. I think all of the fast miles during and at the end of long runs were crucial for performance in the marathon. One of the more surprising aspects of the training to me was that typical weekly volume was only 50 miles and the average volume for the 18 weeks was 45 miles per week.


In order to fuel up during the marathon, I tried a new hydration system from Salomon, the Sense Hydro S-Lab Handheld Hydration Set (pictured above). Each bottle holds 8 ounces, and I filled them with 150 g of maltodextrin (600 calories) in 16 ounces of water. The bottles are held in your hand by the little glove and are very convenient. I drank every 3 miles and finished each bottles in 9 miles. One of the very nice things about these bottles is that they are very light and collapsible. After I finished each bottle I took it out of the glove and just stuck it in my pocket and forgot it was there. I'm not sure I would use them in an ultra given their small size (and I think they would be a bit of a pain to re-fill during a race), but for shorter races they are excellent. Ian Corless has written a full review here.

Sunday, November 18, 2012

The Joys of a Coach

A big change has occurred in my training this fall. Starting in late September I hired a coach to design a training plan for me. The long term goal is to break 24 hours in a mountain 100 mile race, but to start with, we both thought it would be a good idea to train for a road marathon. I have only ever done 3 road marathons and never really trained for one other than doing enough long runs to be able to complete 26.2 miles. I am registered for the Phoenix Rock and Roll Marathon on January 20th. Now the focus is on speed which I have never attempted before. It has been a shock how quickly my workouts have completely transformed. Previously, most of my running was done at a slow pace. In retrospect, too slow of a pace. I got a heart rate monitor in the spring of this year and learned that most of my running was done in a heart rate range of 120-130 bpm with the exception of major hills which forced the heart rate quite a bit higher. Now almost all of my running is between 140-150 bpm and a lot of the running is at even higher heart rates. My coach, Tim Waggoner, is a proponent of Maffetone training using a heart rate monitor. I wish I had learned to train with a heart rate monitor years ago. One of the biggest challenges I have found in trail running is pacing yourself over a 30, 50 or 100 mile event so that you don't go out too hard and bonk, but also that you don't go too slow and leave too much in the tank. The heart rate monitor measures your effort level whether you are going uphill, flat or downhill. It is also a great tool to monitor your progress through training. In July, I ran 10 miles on a track keeping my heart rate at about 145 bpm. I averaged 8:25 min/mile. After 8 weeks of performing Tim's workouts, I repeated this test and average 7:50 min/mile. The test itself is not a particularly hard workout that necessitates recovery, but is very informative as to how your fitness is progressing.

I have been having a blast doing the new variety of workouts including hill repeats, track intervals, progression runs and fun things like a 20 mile run with five sub 7 minute miles spread out over the workout. I have felt stronger and faster as the weeks have progressed which never happened when I was doing my old routine of primarily long slow distance workouts. It's not that any of the workouts is that unusual or something you couldn't find in a variety of training plans, but rather it is Tim's ability to put together a series of workouts in a progression that is challenging without causing my body to break down that I think is so important. I'm not running higher mileage, staying at about 50 miles/week, and am actually spending less time running because more of the running is on roads and I am running much of it significantly faster. If you are considering getting a coach, I would highly recommend it. You will have a lot more fun with your workouts and probably you will get more out of them. I think there a lot of good coaches available now that most coaching is done over the internet. I chose Tim for several reasons starting with his use of the heart monitor as a training tool. Also, he is probably best known in the triathlon world and although I am not training for a triathlon, I do a lot of swimming and strength training in addition to running and I wanted a coach who would understand how to combine all of these workouts. If you are interested in learning more about Tim, he was interviewed on Ultrarunner Podcast, on a Youtube video from Ultimate Direction, and he does a regular podcast with Endurance Planet called Ask the Ultrarunner.

Sunday, September 16, 2012

Lazy Man's Guide to Running the Wonderland Trail

It may seem like a contradiction to refer to a lazy person running the 90 miles and over twenty thousand feet of climbing that make up the Wonderland Trail, but this is your guide if you want to run the trail and maximize how well you feel as you go, hopefully resulting in greater enjoyment of the amazing scenery along the way.

Map of the Wonderland Trail
There are three primary options for running the trail, starting with the simplest, which is to start at any of the trailheads and run continuously around the mountain until you return to your car, carrying all of the needed food and gear with you. Although the simplest option, this does not appeal to lazy runners like myself since it requires the most pain and suffering to finish and you would miss out on a good portion of the scenery as you run through the dark. The second option is to run the trail in two days which is what we attempted to do last year. This allows one some rest and recovery compared to the first option, but we started and finished the first day in darkness last year and it was a brutal day. Definitely not your truly lazy option. The lazy option, which we employed this year, is to run the trail over three days. Not only did we break it into three days, but we did the whole thing without any camping. The first day we ran from Mowich Lake counter clockwise to Longmire where we stayed at the National Park Inn, less than a 1/4 mile from the Wonderland Trail. We had mailed extra food and clothing to the hotel so we could resupply for day two during which we ran from Longmire to White River campground. But the truly lazy do not set up tents and camp. No, the truly lazy have their lovely spouse pick them up at the campground and drive to nearby Crystal Mt. Resort to stay another night in a hotel eating real food at a restaurant before sleeping and being driven back to the trail head at White River for the final leg of the run back to Mowich Lake.

Day 1:

We left Seattle just after 5am to drive to Mowich Lake where we started on the trail about 7am. The section of the trail from Mowich to Longmire is probably the hardest and was definitely the longest of the three days at about 34 miles. It is harder if you plan a route running from Longmire to Mowich than the counterclockwise direction we ran since it is net downhill heading south. Making sure to fill up with water can be critical in this day's journey. There is water available at Golden Lakes and St. Andrews Lake, but the key places to get water in my experience are just north of the North Puyallap River and just south of the suspension bridge over Tahoma Creek. Many of the apparent water sources on the map are direct glacial runoff streams which are too silty to purify and drink.

St. Andrews Lake and the western view of Rainier

Bear guiding us down the trail

The trail reaches its highest elevation of the first day in Klapatche Park which is probably my favorite section due to the views. Bruce got a surprise here when he turned a corner to find a black bear. By the time I caught up with him he was busy photographing it. It was also a lazy runner and wanted very much to stay on the trail. We walked behind it clapping and shouting. The bear was clearly aware of us and wanting to be rid of us, but not at the cost of spending extra energy moving without the trail. So we spent about 10 minutes walking behind the bear urging it along until finally it had enough and moved off the trail. We arrived at the National Park Inn after covering about 34 miles at 4:45pm and were quite happy to find our packages awaiting us and hot showers and dinner at the restaurant went a long way towards recovery.

One note if you are considering running to the National Park Inn with mailed supplies, it turns out that they do not have a means to ship your stuff back home to you. I had not been able to get a clear answer about this on the phone, so took clothing the first day that I was willing to throw away, but in the end the extremely nice desk clerk agreed to mail the box back to us on his own time. Thanks Andy!

Day 2:

The restaurant at the National Park Inn doesn't open until 7am so we had included granola for breakfast in our packages and we were ready to hit the trail towards White River campground promptly at 7am. Starting day two I was amazed to find that although my legs were tired and maybe a bit wooden, neither my legs nor feet were actually sore. This discovery made for a much better start to the day.

Southern view of Rainier from Paradise River crossing


I have to admit that the next section from Longmire to Box Canyon is probably my least favorite of the loop. The trail is pleasant and spends a lot of time along Stevens creek. However, there are fewer views of Rainier and much of the trail is close to the road. There are several places where one could obtain water from the creek, but the important water stop is at Nickel Creek at the beginning of the big ascent to Ohanapecosh Park. This climb takes you from the lowest point of the trail at 2600 feet just before Box Canyon to the highest point at Panhandle Gap. This was the biggest section of the Wonderland Trail that I had not seen previously and for now at least, it is my favorite. The views in Cowlitz Park, Indian Bar, Ohanapecosh Park and on both sides of Panhandle Gap were unbeatable as shown in the photos below.

We completely refilled our water supplies at Indian Bar, but it turns out that there are plenty of snow runoff streams higher up in Ohanapecosh Park approaching Panhandle Gap so there is no need to carry so much water up from Indian Bar. There were a half dozen or so snow fields in Ohanapecosh Park leading up to Panhandle Gap, but the routes across the snow fields were well established with footprints and it was not difficult to navigate in running shoes without poles.

Cowlitz park

Bruce navigating snow fields leading to Panhandle Gap
Approach to Panhandle Gap.

Clouds gathering over Mt. Adams to the south.

Descent into summerland with Emmons glacier in background.
Day two finished with a long wide cushy downhill section of trail packed with dayhikers leading to White River campground where we arrived about 4:55 after covering 31 miles. We were extremely fortunate in our quest to be lazy that my wife agreed to drive from Seattle to the campground to pick us up and take us to a hotel in nearby Crystal Mountain so that we could enjoy a shower, nice meal at a restaurant and sleep in a real bed as opposed to camping in the campground in heavy rain.

Day 3:

I had not slept well during the previous night due to noisy hotel guests followed by a huge thunder and lightning storm. But I was very relieved that it was not raining as we drove back to White River campground for another 7am start. As you can see in the photo below, there was a lot of fog and heavy cloud cover so there are very few pictures from day 3, but at least we did not have to suffer through rain.

We spent day 3 under this cloud cover (photo from plane by Jen Edwards)
Last year when we ran the northern loop, I loved the scenery since the Wonderland Trail approaches glaciers much more closely in this section than anywhere else along the loop. The trail is also above 6,000 feet for an extended time so the views are expansive, or would have been if there weren't so much fog. I think this year that the trail we covered on day 2 through the Cowlitz Divide, Indian Bar and Ohanapecosh Park has now become my favorite but the northern section is a close 2nd. Unfortunately, I still haven't run the northern section on a clear day to fully appreciate the views.

Not too long after passing Sunrise Camp, we were surprised in the fog by another bear, this one quite a bit larger than the one we encountered the first day, but this bear had no desire to lead us along the trail and in fact disappeared into the mist before we could snap a photo.

The Winthrop glacier was hidden by the clouds and fog when we crossed Winthrop Creek, but we did get to see the end of the Carbon glacier as we descended down from Mystic Lake. The Wonderland Trail on the far side of the Carbon river was closed between the upper and lower river crossings, so we continued on the northern loop trail to the second river crossing where crossed over to rejoin the Wonderland Trail. The last climb up to Ipsut Pass is one of the steepest climbs of the entire journey, but it didn't hurt quite as badly knowing that it was the last climb.

Terminus of the Carbon glacier

View back down the route we climbed to Ipsut Pass
We arrived back at the Mowich Lake campground at 2:15pm to finish our journey. Running the Wonderland Trail can't be beat and I highly recommend the lazy aproach to this journey. In fact, if you don't want to run the entire trail, you can see some of the best scenery either by running the northern loop in a single 33 mile day, or the eastern loop (Fryingpan creek trailhead south on Wonderland to Cowlitz Divide Trail to Eastside Trail to Owyhigh Lakes Trail) in a single 34 mile day. I have never gone as far as we did on this trip for multiple consecutive days, and I was amazed at how well I recovered each day and I can only think that getting lots of food and good rest each night played a significant role in the recovery. We were very fortunate that nothing went wrong during the trip and we had excellent weather overall, particularly the first two days. The worst thing that happened was that after carrying a wall charger to re-charge my Ambit GPS watch each night to record our journey, I arrived home to discover that re-charging the watch apparently erases any previous recordings, so I ended up with data only for the last day.

Happy to arrive at the finish


For more photos, follow this link to the complete photo album.

Tuesday, August 21, 2012

Climbing Mt. Baker

An old friend from graduate school days at Berkeley, Roger, came to visit and prompted me into trying something I never thought I would try: climbing a heavily glaciated peak. Since neither of us had experience we booked a trip to climb Mt. Baker with Alpine Ascents. Although using a guide service is expensive, I would highly recommend Alpine Ascents and am very happy with our choice. We had a gear check on Thursday and met the other climbers who would be joining us. Apparently a couple of people canceled and we ended up with 3 guides for only 5 clients. Friday morning we all met at the Schreiber Meadow Trailhead on the south side of Mt. Baker and began a 4 mile, 4 hour hike up 2500 feet to base camp at 5800 feet. It was a relief to get the heavy packs off and set up camp since we wouldn't have to carry much in the pack the rest of the way to the top. After setting up camp, we had a short snow school to learn how to walk on the snow with crampons and how to use the ice axe.

Railroad grade trail on the ridge leading to Easton Glacier.

Our route started on the left side of the glacier, just right of the rocky ridge.
Summit day started with a 3:30 am wake up call and we were roped up and walking on the glacier by 5:15 am. We had two groups of four people on two separate ropes. Each person was spaced about 30 feet apart from the person on the rope in front of them since the largest crevasses in this area might extend to 30 feet. We were hiking up at a very deliberate pace, each climber trying to step into the footprints left by the preceding climber. About every hour we took a 5-10 minute break sitting on our packs, taking in the views, and refueling. At first we climbed about 1,000 feet an hour but later in the day our progress slowed, I think primarily because route finding became more difficult and we began to zigzag a lot to avoid crevasses. Around 9,000 feet we approached the lip of the crater but there much too much of a gap between the snow and the dirt rim to climb up and look directly down into the crater. We had been smelling and seeing gas rise from the crater all morning and I had been looking forward to peering into the crater.

View of the San Juan islands

Our route from base camp to the top

After traversing left from the rim of the crater, we began one of the steepest sections of the day, known as the Roman Wall. The guides were taking more time to find a route through this section as the number of crevasses kept increasing. I had been concerned prior to the trip that we would have to jump over crevasses but up to this point although we had stepped across several gaps in the ice there had not been anything that caused me any particular anxiety. I have to admit, though, that after staring deep into several crevasses, I tended to keep my gaze fixed more on the footprints in front of me and not think too much about the depth of the crevasses. As we neared the plateau on top of Mt. Baker, we came to a final crevasse which required a fairly large step to get across with the far side being significantly higher than the near side. The first 5 climbers went over this fairly easily, but the climber in front of me struggled a bit as several chunks of snow fell into the crevasse as he tried to cross. He made it over and I stepped up to cross. As I raised one foot to step across, my other leg plunged through the snow and I fell to my waist with one leg dangling in the crevasse. For some reason I wasn't really scared. Probably because it happened so fast and at that point I was still lying mostly on top of the snow. But I was lying with my face looking down into the cavernous open space below me. The guide had the climber in front of me and in back of me lie down in the snow with their feet dug in and their ice axes in the self arrest position while he came back to coach me. I was able to pull my leg up and back onto the surface of the snow. I was a bit nervous to stand up but did so downhill of where I had fallen through. The snow the previous climbers had used to step from in crossing the crevasse now contained two holes. The guide suggested that I step between the two holes and cross. This wasn't what I really wanted to do. But lying on the couch wasn't really an option at that point so cross I did.

Gas escaping from the crater

Looking down from the summit plateau
At the top of the Roman Wall the slope eases considerably and we walked across a relatively flat snow covered plateau over to a small dirt peak which is the true summit at 10,781 feet. Another group of climbers arrived at the peak about the same time we did but they had climbed the Coleman-Deming route starting from the Northwest side of the mountain. The views from the top were stunning, although forest fires burning for the last week or two had resulted in very hazy conditions despite blue skies. We left the summit about 1pm and I was a bit non-plussed to learn that we would attempt to go down and cross the problematic crevasse at the same point where I had fallen through on the way up. But fortunately everyone made it across without incident on the way down. The trip down was much easier and faster not surprisingly and what took us 8 hours to climb up only took 3 hours to go down. The next morning we woke and broke camp to arrive back at our cars around 10:30am.

Happy to be at the top!
View of Mt. Shuksun from the Baker summit
Baker lake from the summit

Looking down into the crater
Hiking out on the railroad grade trail in the morning clouds (photo by Pete Lardy)

Sunday, August 5, 2012

Mt Adams Circumnavigation

Continuing my practice of running around volcanoes (see Mt. St. Helens here and the first half of Rainier here), last weekend we decided to attempt the circumnavigation of Mt. Adams. Although only 35 miles with about 7K of climbing, this route sounded potentially more difficult due to the lack of trail for a 5 mile section on the eastern side of the mountain. In the end, navigating through the off trail section (although slow) proved to be less challenging than the PCT section on the western side due to the heavy snow cover on the western side. If you are game for the challenge of the off trail section, I can't recommend this route enough. The scenery is amazing, with endless mountain/glacier views, green meadows, wildflowers, buffed out runnable single track, plentiful water, and it's readily doable in a day.

GPS recording of our route
Rich, Justin and I made the four hour drive to Cold Springs campground Friday night and camped at the trailhead. We started just before 6 am on a beautiful morning with a forecast for sunny skies and temperatures in the 80s. Since I was unable to find any blog posts or descriptions on the route I will provide some detail on this although if you are interested in the route I highly recommend the book Trekking in Washington, by Mike Woodmansee. You can read more about Woodmansee's route in this Seattle Times article. We began by ascending the South Climb trail for a little over a mile and then turned right onto the Round the Mountain Trail. We followed this for 2.3 miles at which point we entered the Yakama Indian Reservation and continued on the Round the Mountain trail for another 1.1 miles before turning left on the Flower trail. This trail leads up to the Viewpoint at 6500 feet at which point the trail ends.

View of the south east face of Adams from the end of the trail.
From the end of trail Viewpoint looking into Hellroaring Meadow

The ridge we came down into Hellroaring Meadow
I am not going to provide the detailed directions for navigation of the off trail section since the route was developed by Mike Woodmansee. But if anyone wants guidance while attempting the route,  I am happy to provide the GPS file. Just leave a message in the comments. The directions provided in the book, combined with careful attention to the elevation (barometer measurement from the Ambit as well as GPS measurement by Garmin) worked perfectly for us and we never had any significant issues with navigation. There is a dotted line route marked on the Green Trails map that I carried, but this route is very different (goes much higher on the mountain) than the route described in the book and I would advise against trying to follow the route marked on the map. It was fairly slow going without a trail and we averaged 50 minutes per mile through the off trail section.

Upper basin of Hellroaring Meadow
Hellroaring Meadow from the climb up to Ridge of Wonders

We descended into Hellroaring Meadow and then climbed up onto the Ridge of Wonders which led to a very steep rocky scree filled descent into the next basin. Fortunately Justin and Rich were braver than I was and led the way down this descent. I am embarrassed to admit that I basically did a crab walk/butt slide down most of this. One day I will learn how to ski on my feet down scree, but it does not come naturally. The next navigation challenge is crossing the Big Muddy Creek which is really mis-named. This is the glacial runoff from the Klickitat Glacier and it comes roaring down the basin. It took a while but we eventually found a place to jump across at around 6000 feet elevation although I have to say it was a much longer jump than I wanted to do and I was tempted to attempt wading across although this is certainly not recommended. Later in the day we ran into some backpackers who had crossed much higher on snow above the water.

Eastern side of Adams from Ridge of Wonders
Finding a place to cross Big Muddy

From there we had only to cross Avalanche Valley with 4 more streams before rejoining the trail at the camp/springs at 6700 feet just west of Goat Butte. From the camp the trail ascends to the highest point of the circumnavigation at Devil's Garden, 7700 feet. At this point we exited the reservation and started the most enjoyable running section of the day as we descended almost 2000 feet on soft trail with stunning views of Mt Adams on the left and Mt Rainier to the right. Another 2 miles and we joined the Pacific Crest Trail which we would stay on for most of the western side of the mountain.

Green meadow with spring just west of Goat Butte at 6700 feet
Enjoying some sweet single track after regaining the trail
Rich leading the way
Mt Rainier from the north side of Adams


The PCT should have been one of the most enjoyable sections of the day since when we could see the trail it was smooth and very runnable without a lot of elevation change. I haven't been unable to understand how the trail can circumnavigate the west side of the volcano without frequent elevation changes down into gullies/canyons carved by glacial runoff but for some reason the western side is relatively flat. Unfortunately for us, however, the smooth running did not last very long because most of the PCT was still buried in deep snow. In addition to slippery footing and not running very much, this became a real navigation challenge since the snow covered sections lasted much farther than you could see and unless there were footprints going the correct direction we had no idea where to go. If Rich had not had a handheld GPS with map/trail loaded onto it, I'm not sure we would have made it through all the snow.

Northwest view of Adams from the PCT


Snow covered PCT lasted for miles along the western side

I was pretty much mentally defeated by all the snow and frustrated by not being able to run. But eventually we made it past the PCT section and once we turned onto the Round the Mountain Trail along the south side of the mountain the trail was relatively snow free and it was nice to finish off the day with 6 or 7 runnable miles. We were happy to finish without the need to use headlamps for a total time of about 14.5 hours. Even though the direct glacial runoff is too silty to purify with the steripen we were using, water sources were plentiful and I never had any issues carrying only two 16 oz water bottles.
Rich and Justing at the finish line around 8:30pm